Intention
Bitmap tracing is intended to convert bitmap data into vector data by detecting edges. This detection is done by the comparison of gray-values. To detect edges, the color values must differ enough, otherwise tracing will fail.
Trace the bitmap image
Starting the trace is done by selecting the image and clicking the trace icon.

This will open the following widget.
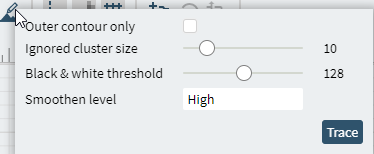
Adjust the parameters and click “Trace” to start the tracing process.
Depending on the source image and the values chosen you will receive a trace result.
Note: If the settings result in an empty trace, an error message will pop up and no vectors are created!
Parameters
Outer contour only
Limit the detection of edges to the most outer contour only. This way the tracing algorithm will not search for additional contours inside a detected one. This function is used when outer contour cutting is intended.
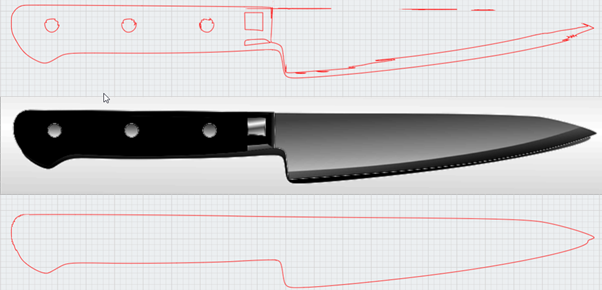
Tracing with outer contour only on (below) vs. off (above)
Ignored cluster size
This parameter is used to minimize noise. Raising this value instructs Ruby® to ignore bigger clusters of pixels with similar color.
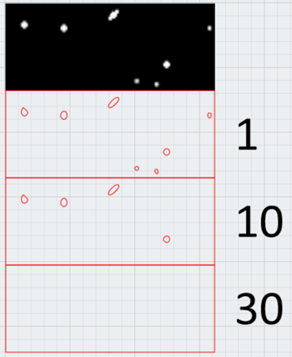
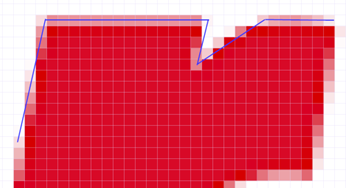
Tracing with a cluster size of 1 (above), 10 (middle) and 30 (below).
Raising the value filters out the bigger white dots till only the contour (black rectangle) is detected.
Black &white threshold
This parameter has the highest impact on tracing, because it defines the level of contrast that will be used for detecting the edges.
The number represents the gray value (Index 0-255) that will be used as the threshold for adding a pixel to the vector or not. This means, any value below will be treated as black, any value above as white. The resulting black and white areas define the edges that will be detected (this is done in the background not visible to the user).
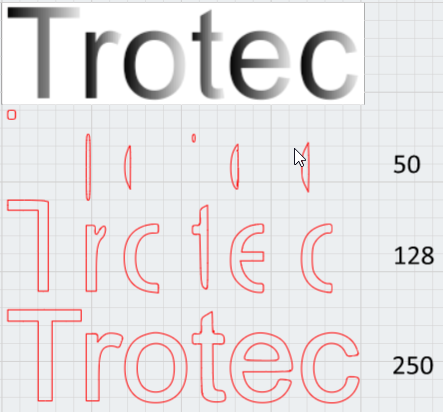
Results depending on the selected threshold. At the beginning only the real dark areas are detected, in the end only the white background is excluded.
Smoothen level
As images consist of pixels those make up “stairs” when zoomed in enough.
Tracing the image would then generate a vector that is following those “stairs”. In most cases that is unintended.
With “Smooth level” you can define, how precisely the algorithm shall follow the contour. Higher smoothing will result in less edgy vectors. On the other hand, smoothing too much may lose details.
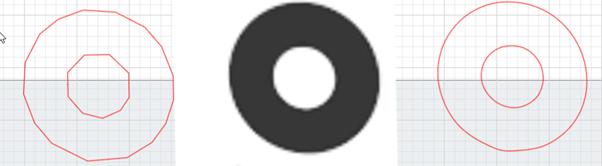
Tracing an “o” with no smoothing (left) vs. high smoothing (right) clearly shows the effect on the circles.

Smoothing too much will lose details.
How to get the best out of it
High-quality source images
Bitmaps in Ruby® will always be converted to grayscale images. Use bitmaps with high quality, because they deliver the best results. Images that share colors between the section to trace and the background are also hard to trace. No clear edge can be produced.
- Good – high quality, good resolution, high contrast, few anti-aliasing on edges, no mixed colors

- Bad – low resolution, poor contrast, heavy anti-aliased
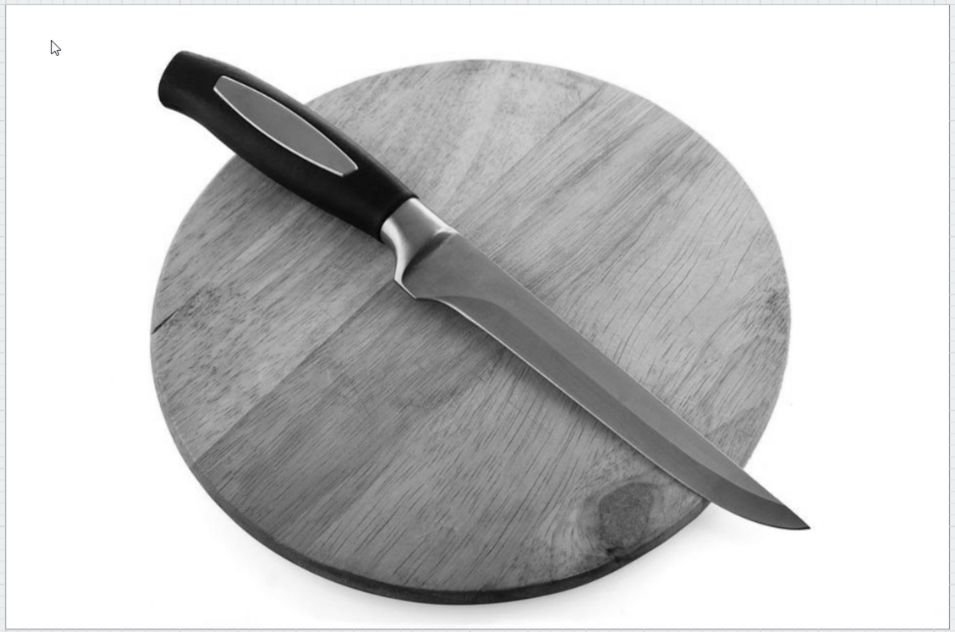
- Bad – colors of knife and background are mixed, creating an edge is not possible


Enhance the image before tracing
Eliminate as much noise in the image as possible by adjusting the contrast and color threshold. Everything that is not in the bitmap, can’t be detected incorrectly. There are some tips you might want to follow inside and outside of Ruby®:
Adjustments before importing into Ruby®
Crop to necessary part of the image
Cut away any parts you don’t need for the contour. Rotating the image may also help to only crop the desired part.
Before:
After:

Remove other content
Open the image with an image editor and remove as much background or unwanted parts as possible (eraser, color replacing, etc.).

Adjustments within Ruby ®
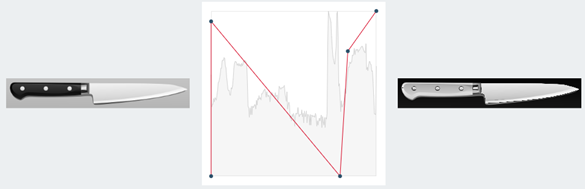
Adjust color threshold (tone curve)
Adjust the color thresholds to improve edge quality. This is done by selecting the image and clicking the pencil in the top right corner.

Now try to adjust the image in a way, that the background becomes as bright as possible and the contour as black as possible.
Also, the other way around is possible but detects the inverse contour!


Basically it works that way:
- X-Axis defines the input color (= which gray values from the original should be changed)
- Moving a point to the left includes more colors towards black
- Moving it to the right includes less colors towards black
- Y-Axis defines the output color (= to what color the input color should be changed)
- Moving the point upwards creates a brighter color (towards white)
- Moving a point downwards creates a darker color (towards black)
- Grab the line at any point and move it as needed
- All colors between the points will be changed accordingly
More detailed explanations can be found on the web when searching for “tone curve input output”.
The following examples illustrate the differences:
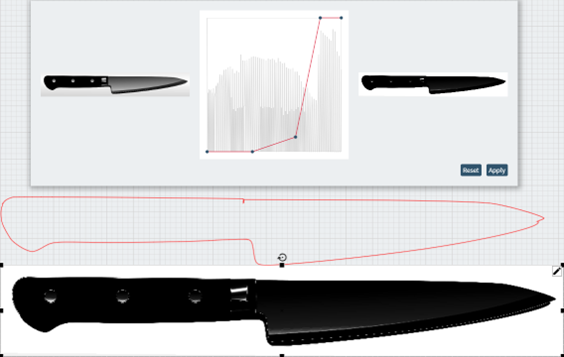
White background, black contour is easy to trace and gives the wanted contour.
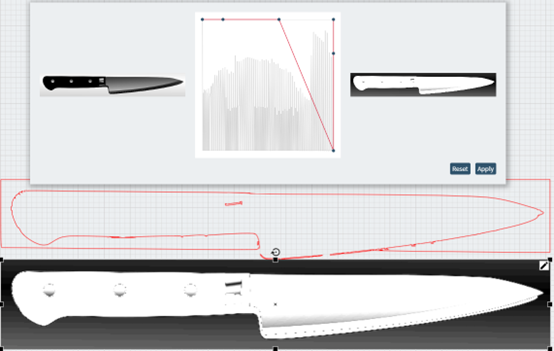
Black background, white contour is harder to trace and produces the inverse contour.
Summary
- Use images with good quality.
- Bitmaps with bad quality (e.g. low resolution, lots of artifacts, low contrast, shared colors between contour and background, etc.) normally cannot produce good traces.
- Prepare the source image as ideally as possible for tracing.
Remove noise, unnecessary parts, adjust contrast and color thresholds – what’s not there, cannot be detected falsely. - Know what should be achieved.
Tweak the right parameters in the right way. Just doing trial and error will take a lot of time and will often be frustrating. - Bitmap tracing cannot do magic
If the contour is not clearly defined (because it has e.g. shadows, bright parts that merge with the background, etc.) it simply cannot be traced!