Ruby® Beta Phase has ended. All content on www.rubyhelp.com is related to Ruby® 2.
Please update your Ruby® to the latest version.
To download Ruby® 2 please go to ruby.troteclaser.com and get the latest version.
As Beta user you can continue using your current login data, no additional activation necessary.
Hier können Sie einige persönliche oder Geräteeinstellungen ändern.

| Speichern Sie Ihre Änderungen | |
| Wählen Sie, wie die Einheiten angezeigt werden sollen | |
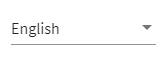 | Ändern Sie Ihre Sprache |
| Pdf-Ebenen importieren | |
 | Choose your lid camera |
 | Wählen Sie einen Grundstellungstyp |
 | Benutzerdefinierte Grundstellung |
 | Benutzerdefinierte Grundstellung |
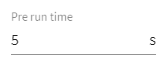 | Absaugung-Vorlaufzeit |
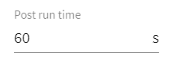 | Absaugung-Nachlaufzeit |
| Auspuff während des Prozesses prüfen | |
| Luftunterstützung – Gas-Kit installiert | |
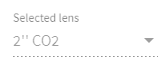 | Wählen Sie ein Objektiv |
| Enable the vision camera |
Vision camera calibration
- Enable the Vision camera by clicking on the switch.
- Click save to continue the process. (Settings must be saved before calibration is performed)
- If your queue isn’t empty you will get a pop-up that your queue will get cleared.
- Enter Parameter to cut through your calibration (eg. Power: 10%; Velocity: 1%)
- Move the laserpointer to the spot where you want to cut the calibration circles.
- Click on „Queue calibration job“ to start the calibration.
- Switch to the Produce Screen and start the job
Note: The camera detects the offset values and adds them to the settings.